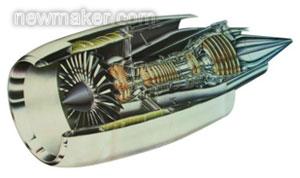
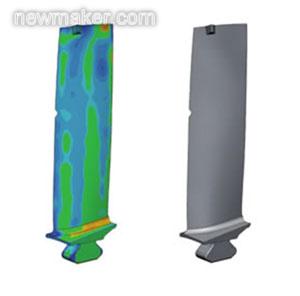
Quantitative detection of jet propeller blades
Combined with quantitative quality inspection technology (3D QAC) and powerful detection software, it is easy, fast, accurate and reliable to obtain the complete 3D data of the surface of the measured object and
The data model of the object performs various comparison calculations. The overall and local deformation, the position of the deformation and the amount of deformation can be detected quickly, simply and accurately. The deformation may come from aging, or other causes. From measurement to complete test and analysis data in just a few minutes, it is convenient to guide the next step of production, to ensure the production of precision qualified parts according to the CAD drawings.

The main applications and advantages of 3D QAC
- The entire surface is fully inspected. This type of inspection focuses on the whole, not the specific area and its details, making the test conclusion more complete and reliable.
- Identify deviations, locate and quantify them.
——Re-inspect the 3D geometry of the qualified parts that have been put into storage (such as the first piece of inspection and the sampling in the production process).
- For the quality problems caused by physical properties of materials, the deviation due to quality problems such as aging, rust and overuse of materials is recorded and judged whether it is qualified.
- Significantly reduce the quality inspection time in the production process by testing the first piece and improving production
——The rapid and accurate inspection enables people to find and eliminate problems early, greatly improving product quality and production efficiency.
user
GE Aviation is the leader in all engine manufacturers for military aircraft, commercial aircraft, jet aircraft, carrier aircraft, power station engines and various wind turbines.
Measuring principle
Topological geometry: using micro-structured light projection technology based on gray coding and phase shift technology, edge detection technology in triangulation and 2D image processing.
The entire inspection and comparison process is divided into two main steps. Using Borcoman's 3D scanning digital system stereoSCAN 3D-HE and the turret-turning turnilt UNITGE-15 turntable, the 3D data of the blade is automatically generated by the software OPTOCAT. The powerful software Rapidform XOV/Verifier automatically compares the measured data with the model data to give a conclusion on whether or not to pass the test.
1. Scanning and data processing
The blade is fixed on the turntable turntiltUNITGE-15, and then the scan measurement and data are automatically completed using Borkman's stereoSCAN 3D-HE system.
Store work. Blade geometry measurement and digital visualization are performed using Borkman's OPTOCAT software. Then convert the 3D data into a pair
The STL or PLY format (typically Rapid Forming Rapids XOV/Verifier) ​​that matches the data format received by the software.
2. Quality identification
Load CAD model data.
Determine the detection site and test content: edge tangent and blade thickness.
Determine the inspection data to be loaded: edge, twist angle and blade root position.
Transfer the obtained measurement data.
Automatic identification of the comparison process, including the generation of measurement reports and archives.

The 2D and 3D color deviation maps are illustrated, and the theoretical values, measured values, and deviation values ​​are given in tabular form. The iltUNITGE-15 and powerful matching detection software provide fully automated quality inspection of the surface of the object. Instead of the traditional reliable but time-consuming detection method. Although the comprehensive inspection increases the stored data, the inspection time is greatly shortened, and the inspection results are more complete, accurate and reliable. The test results are used in turn to guide the production process, greatly improving product quality and production efficiency.

Concerned about surprises
Tag: blade thickness detection software edge detection scanning digitization phase shift
Previous: Automotive Engineering--Reverse Scan Next: 3D Quality Inspection of Car Sheet Metal Stampings
The use of diamond cord core drill bits must be done step by step according to the requirements of the onion, not to be rushed, and the drill tool assembly, deployment, and maintenance must be done well.
The characteristics of rope core drill pipe are "three highs and one low", that is, high drilling speed, long life of diamond bit, high time utilization rate, low labor intensity of workers, so it is widely used in geological prospecting, coal field exploration and other fields. Among the whole set of drilling tools, the most important and most valuable is the drill pipe. The quality of the drill pipe is directly related to the use of the advantages of rope core drilling, and is also vital to the accurate acquisition of geological data and the control of drilling costs.
Drill Bits,Diamond Drill Bit,Surface-Set Diamond Bits,Pcd Drill Bits
wuxi shengmeirun trading co.,ltd. , https://www.wxsmrxz.com